
There is something so cuddly and cheerful about a chubby little paper penguin smiling up from a snowy sky. This penguin paper craft is one of those gentle projects that always wins kids over instantly, and the finished result is sweet enough to hang on the fridge for weeks. No tricky shapes, almost no mess, and everything you need is probably already tucked into your craft drawer. 🐧
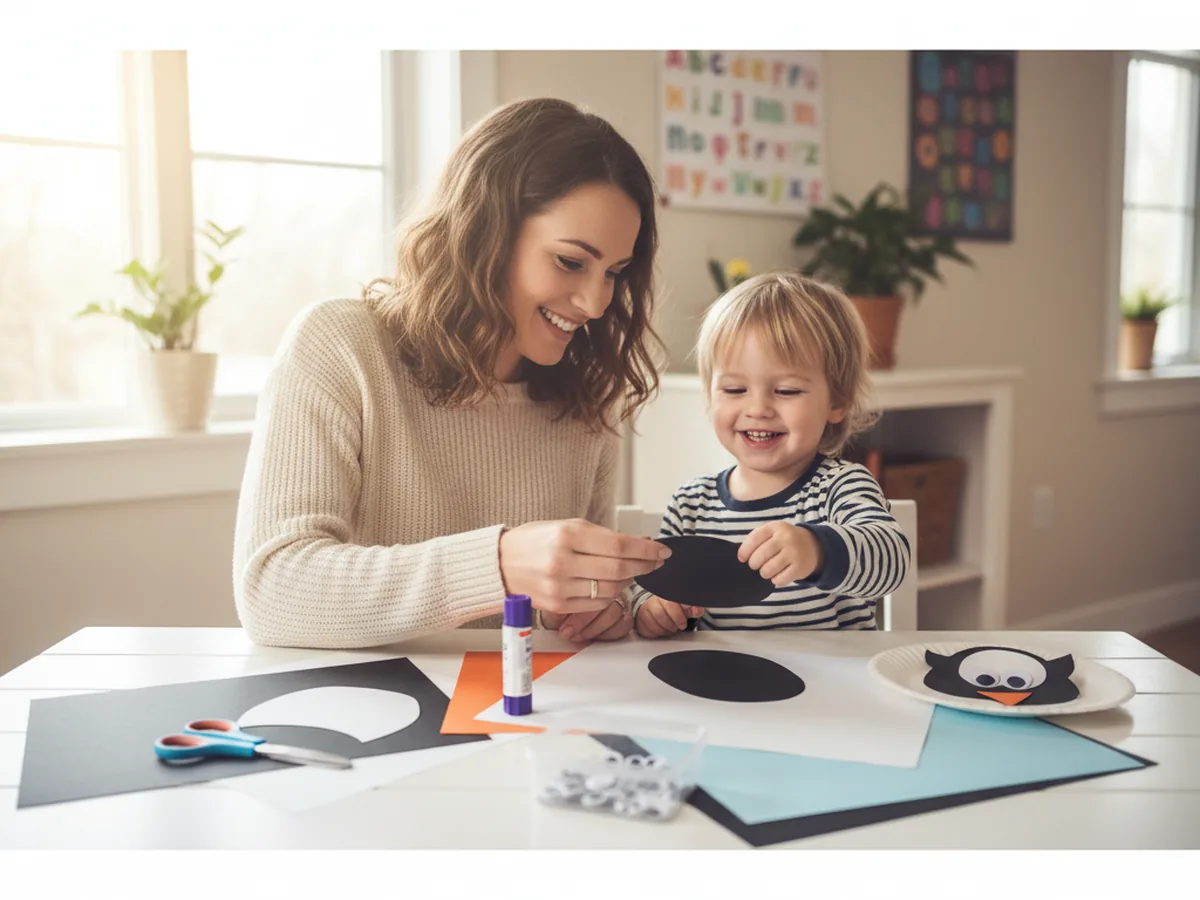
The whole project takes about 30 minutes from start to finish, including the fun bits where your child sticks the googly eyes on and decides exactly how silly the penguin's face should look. It is a cozy afternoon activity that fills the kitchen with quiet giggles and ends with a finished little waddler your child will want to introduce to every stuffed animal in the house.
Why Kids Love This Craft
Penguins are absolute charm in animal form, and kids know it. Their funny waddle, their tuxedo bellies, and their tiny flippers feel friendly and giggly all at once. This penguin paper craft gives little ones a chance to build that whole adorable bird with their own hands, one shape at a time. Watching the penguin appear piece by piece on the page is genuinely exciting at this age.
Each step is simple enough that even small hands can help with most of it. Cutting basic ovals and triangles, peeling googly eyes, and sticking shapes onto the background all involve the kind of low-pressure fine motor practice young kids need anyway. Because the project comes together quickly, children stay engaged from start to finish without getting frustrated.
Once the paper penguin craft is finished, it almost always slides right into pretend play. Kids name the penguin, invent its favorite snack, and make up stories about the snowy world it lives in. That natural shift from craft time into imaginative storytelling is exactly the kind of open-ended play that keeps little minds beautifully busy long after the glue dries. ❤️
What You'll Need
Everything for this penguin paper craft comes from a basic craft drawer. Here is the full list of supplies.
- Crayola Construction Paper (240 sheets, assorted colors), you will mainly need black, white, orange, and light blue, plus a small piece of red for the scarf.
- Elmer's Washable Glue Sticks (6 count), a glue stick is cleaner than liquid glue and just as strong for layered paper shapes.
- Fiskars 5" Blunt-Tip Kids Scissors, safe and easy for little hands to manage all the cutting.
- Upins Self-Adhesive Googly Eyes (1000 count), the peel-and-stick kind makes the penguin face come alive in seconds.
- Crayola Broad Line Washable Markers (12 count), for adding the cheek dots and any tiny snowflake details to the background.
- Pencil, for lightly sketching the penguin body and belly shapes before cutting.
Step-by-Step Instructions
Take your time with these steps and let your child help wherever they can. The penguin paper craft comes together naturally as each shape finds its place on the snowy blue background.
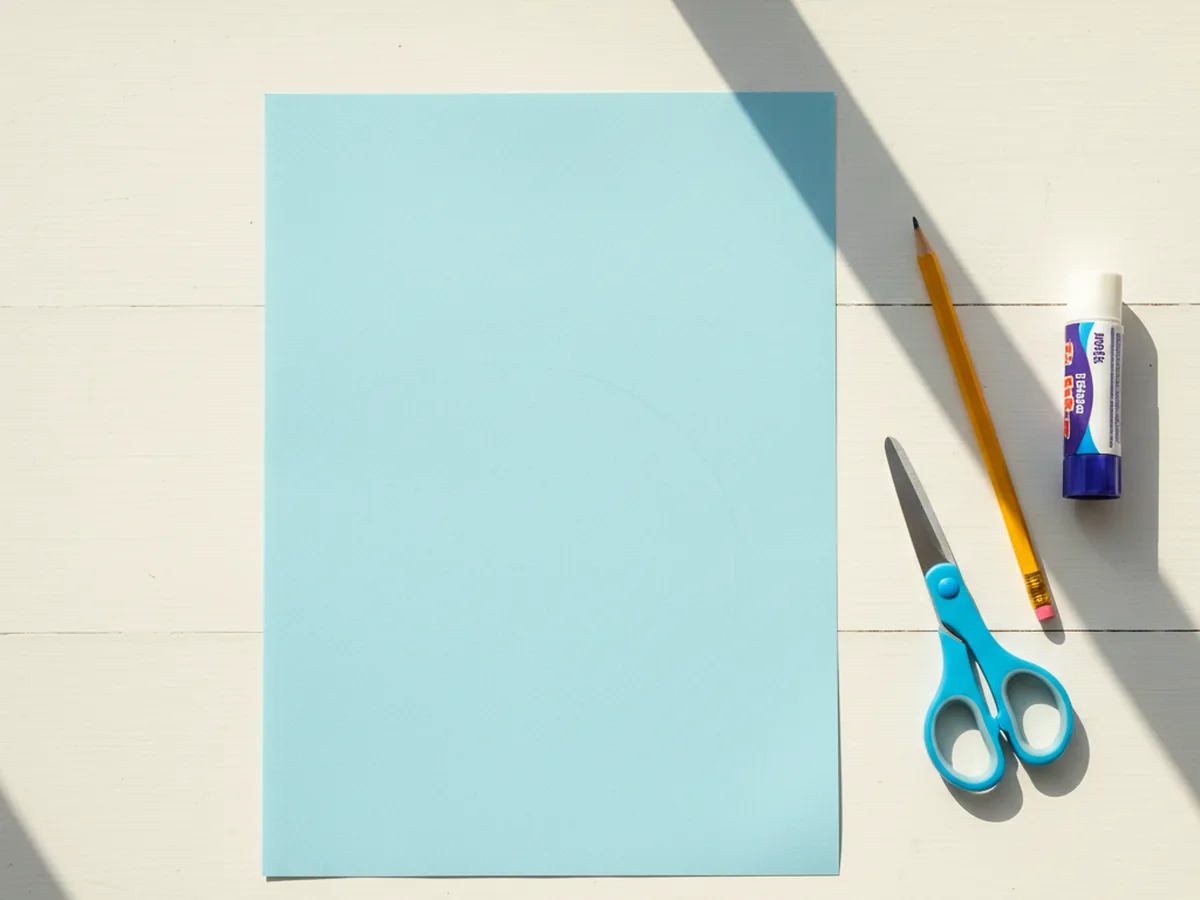
Step 1: Lay Out the Snowy Background
Start by placing a full sheet of light blue construction paper flat on the table in portrait orientation. This will be the snowy sky behind your penguin paper craft. There is nothing to cut or draw at this stage, just smooth the paper out and make sure it sits nicely so the penguin pieces have a calm, soft background to land on.
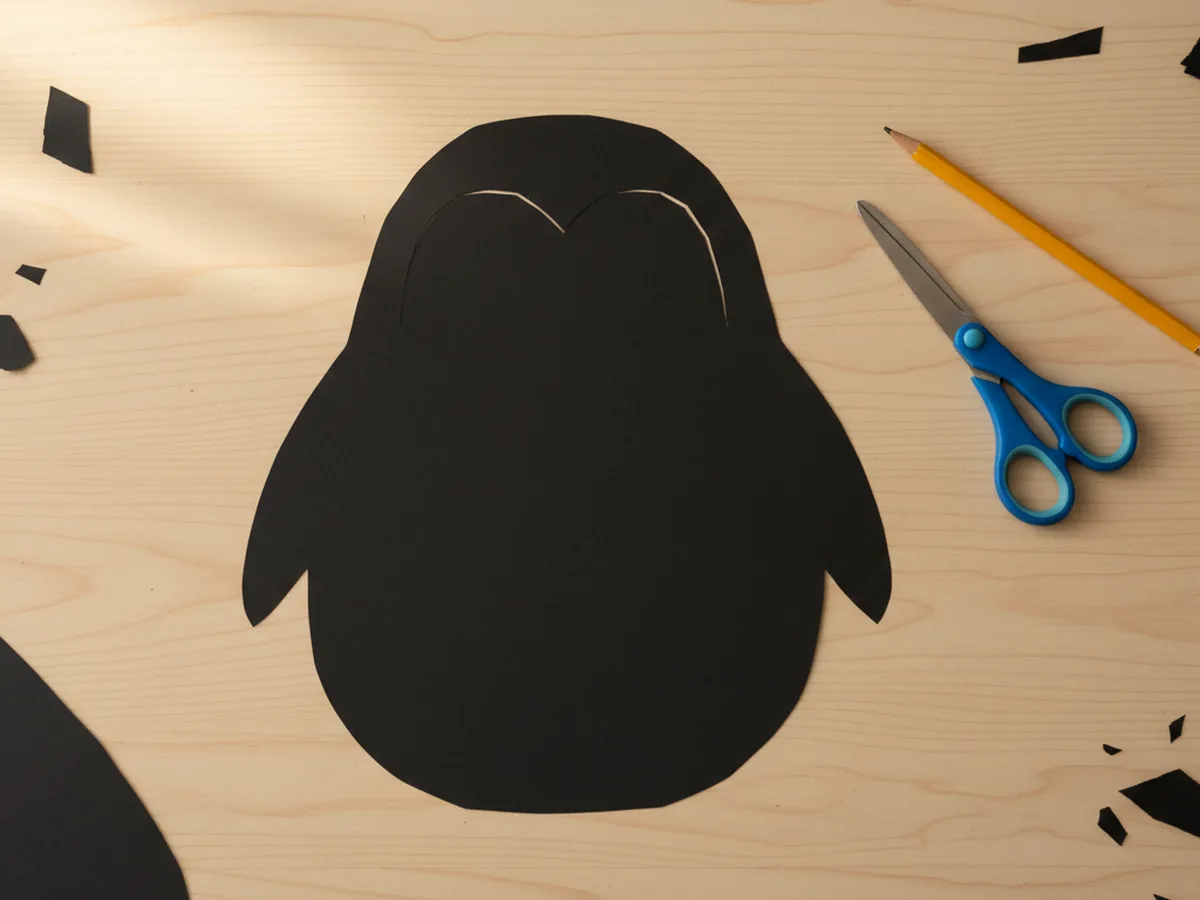
Step 2: Cut the Penguin Body Shape
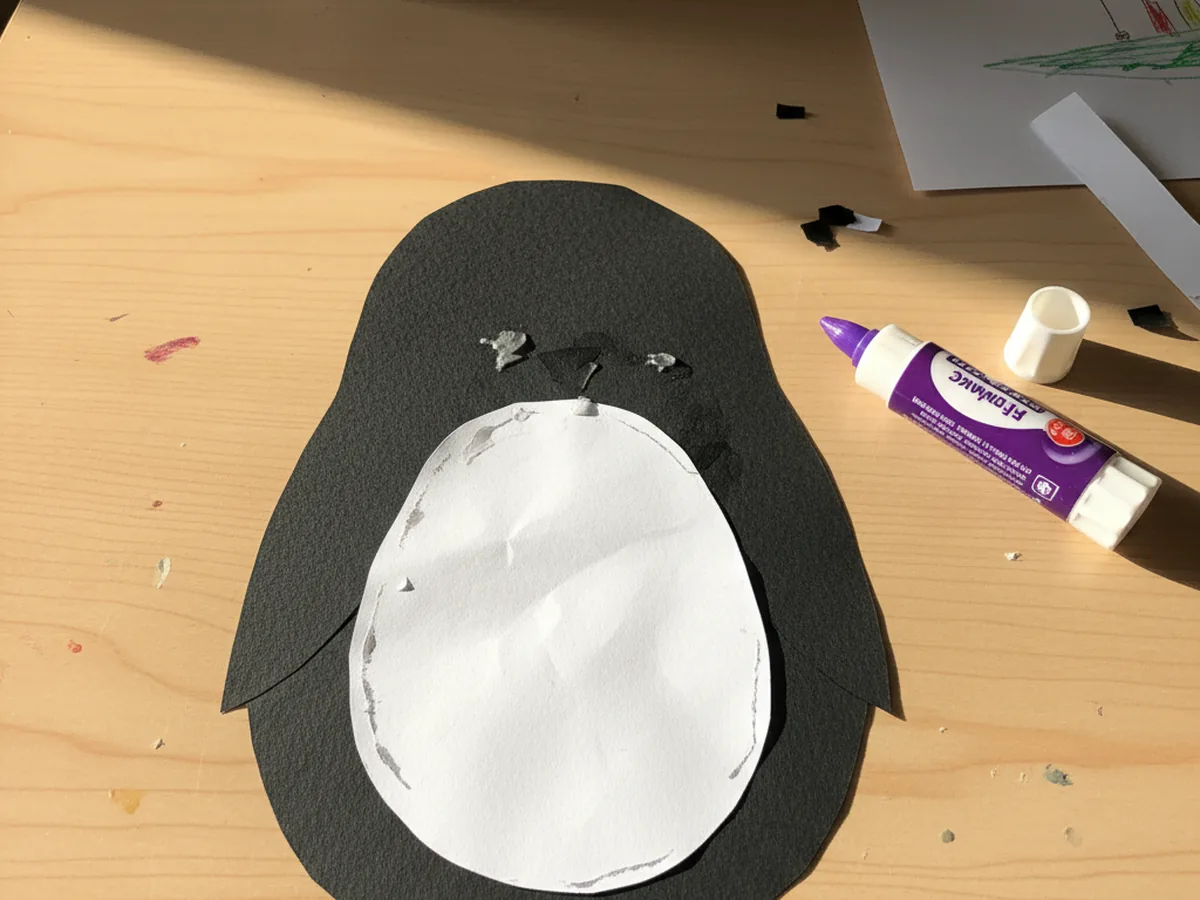
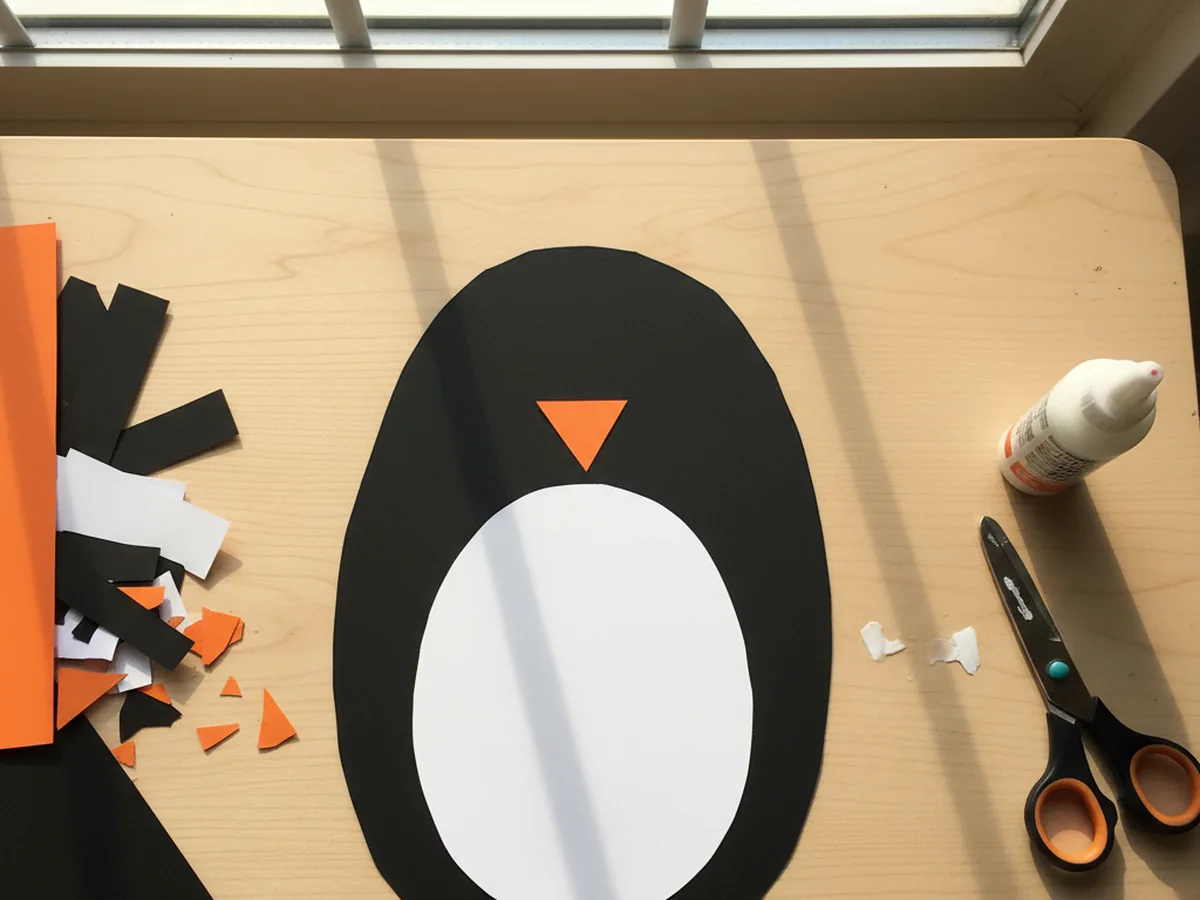
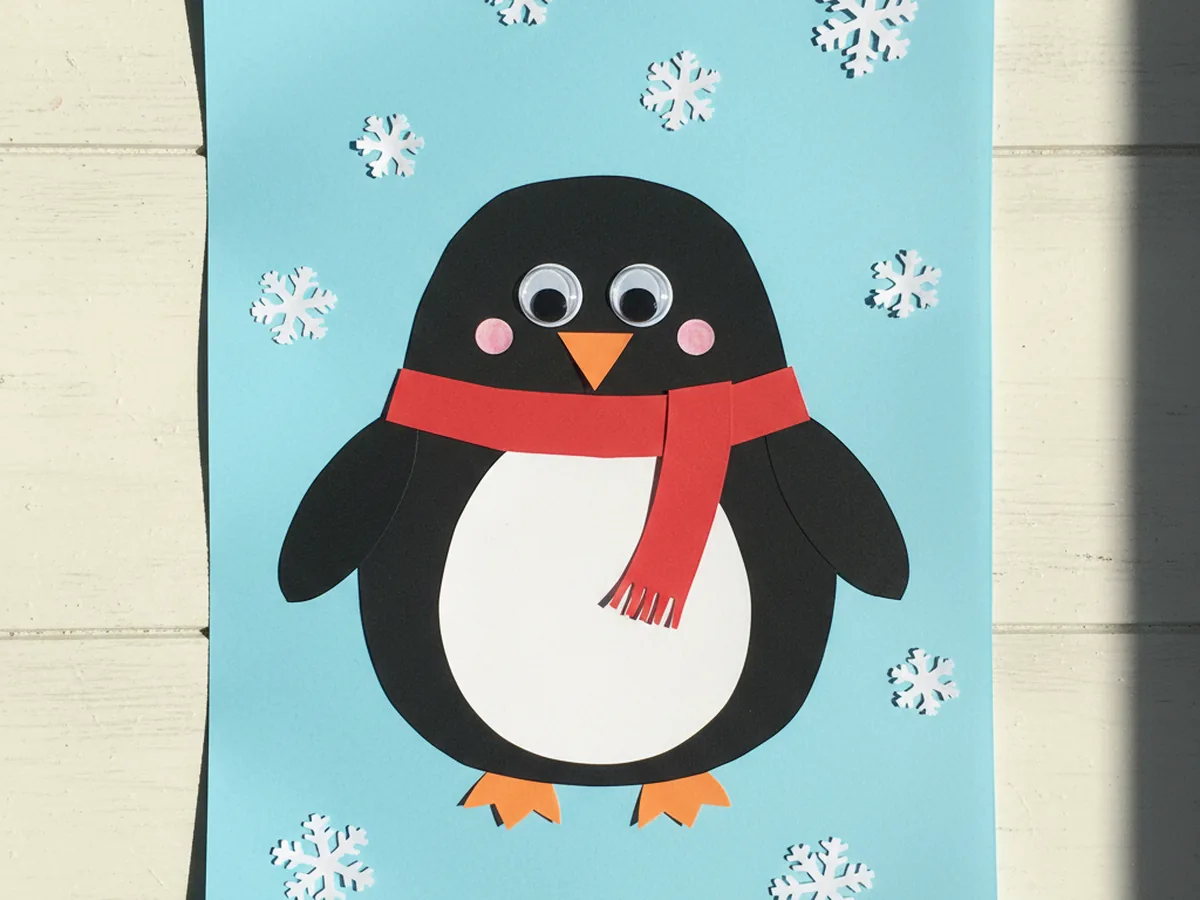
From a sheet of black construction paper, cut a tall oval shape to serve as the penguin's body. Aim for a chubby oval that is a little taller than it is wide, so the penguin looks pleasantly round and friendly. If your child is doing the cutting, sketch the shape first lightly with a pencil so the lines are easy to follow. The oval does not need to be perfectly symmetrical, a slightly wonky belly only adds to the charm.
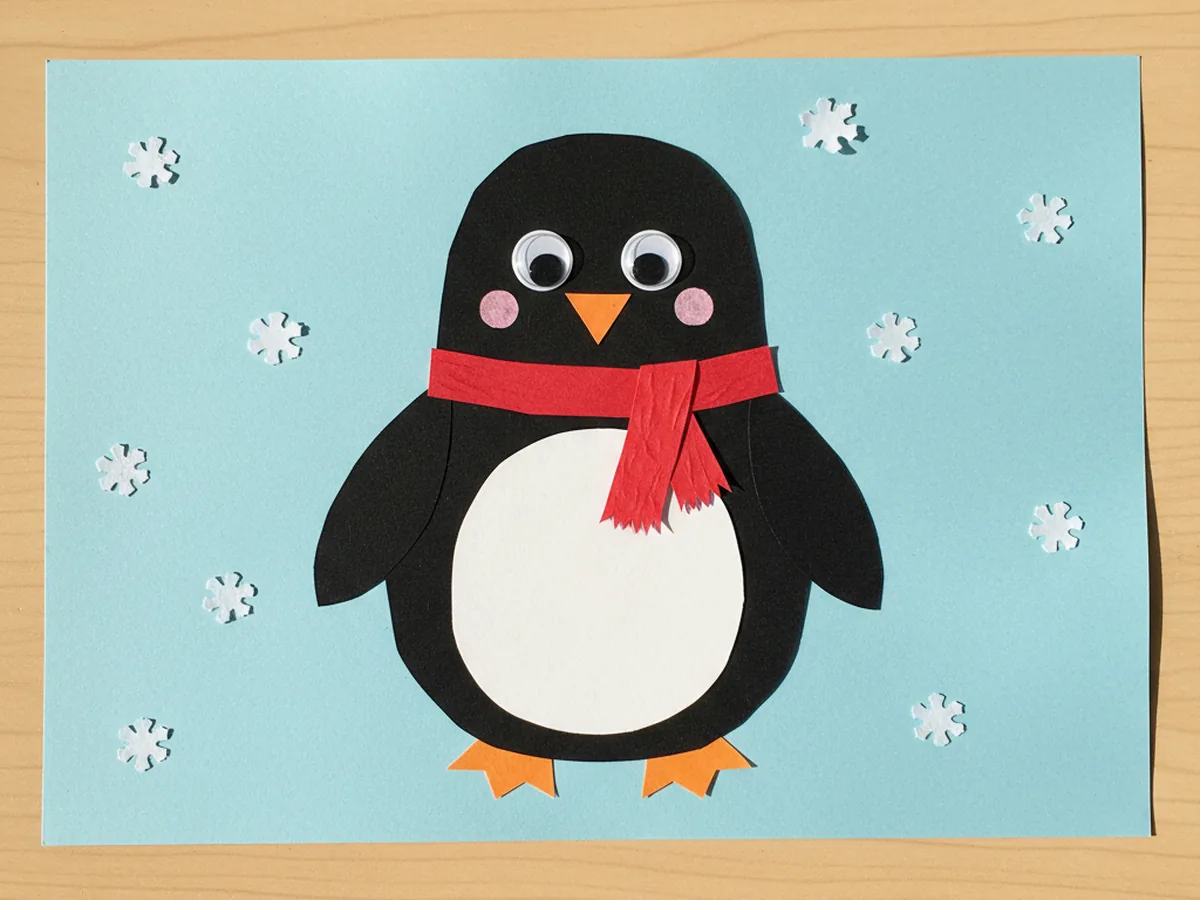
Step 3: Add the White Belly
Cut a smaller oval from white construction paper to make the rounded white belly. The white shape should be a little bit shorter and narrower than the black body, so a clear black border shows around the edges. Spread glue on the back of the white oval and press it down firmly in the lower middle of the black body. This is the moment the shape really starts to look like a tuxedoed little paper penguin.
Step 4: Glue On the Orange Beak
From orange construction paper, cut a small triangle for the beak. Aim for a triangle about the size of a large coin, with a slightly rounded base so it sits naturally on the face. Spread glue on the back of the triangle and press it onto the black body just above the white belly, pointing slightly downward so it looks like a real penguin beak. This little orange pop of color is what gives the penguin paper craft all its personality.
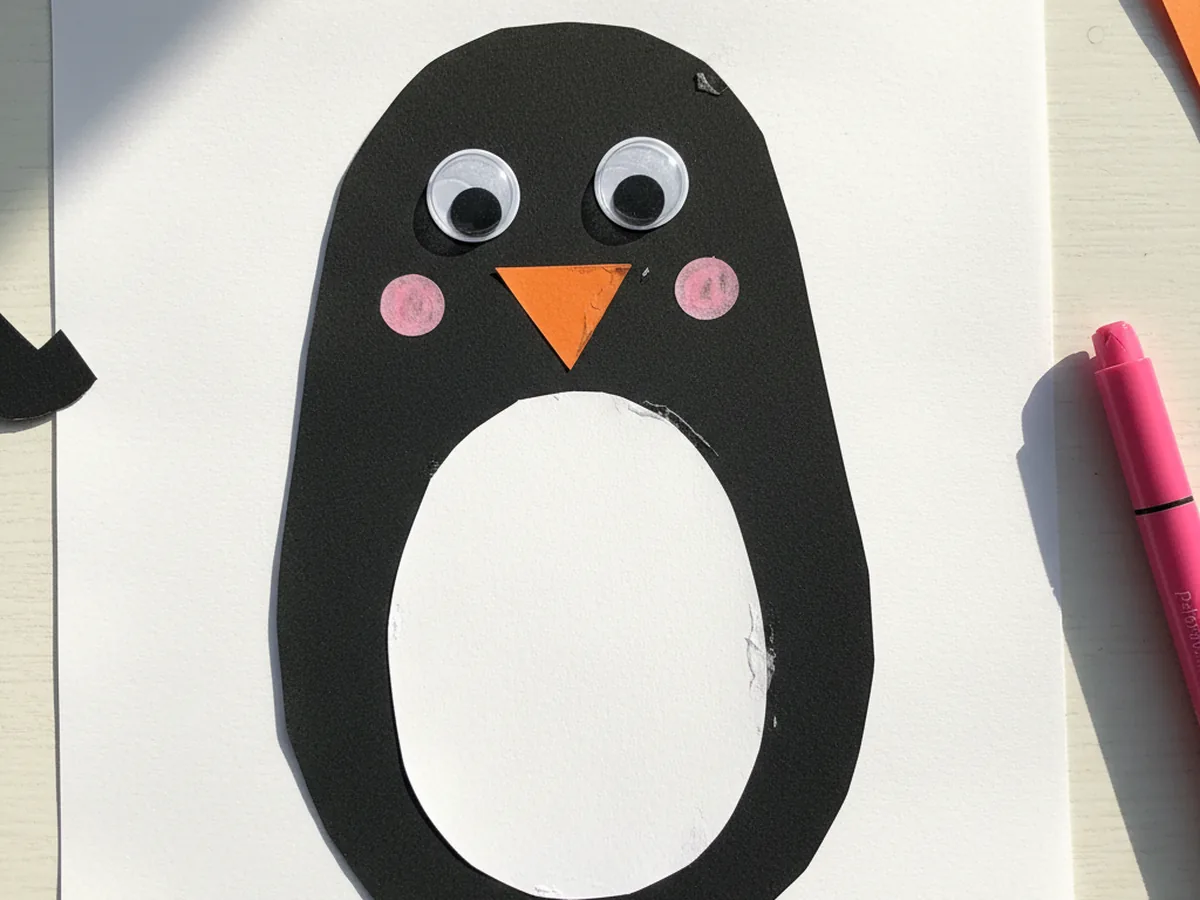
Step 5: Add the Eyes and Cheeks
Now bring the face to life. Peel two googly eyes from the sticker sheet and press them firmly above the orange beak, leaving a small gap between the two so the penguin looks bright and friendly. Then use a pink or red marker to draw two soft cheek dots just below and to the sides of the beak. The whole face suddenly feels full of warmth and curiosity.
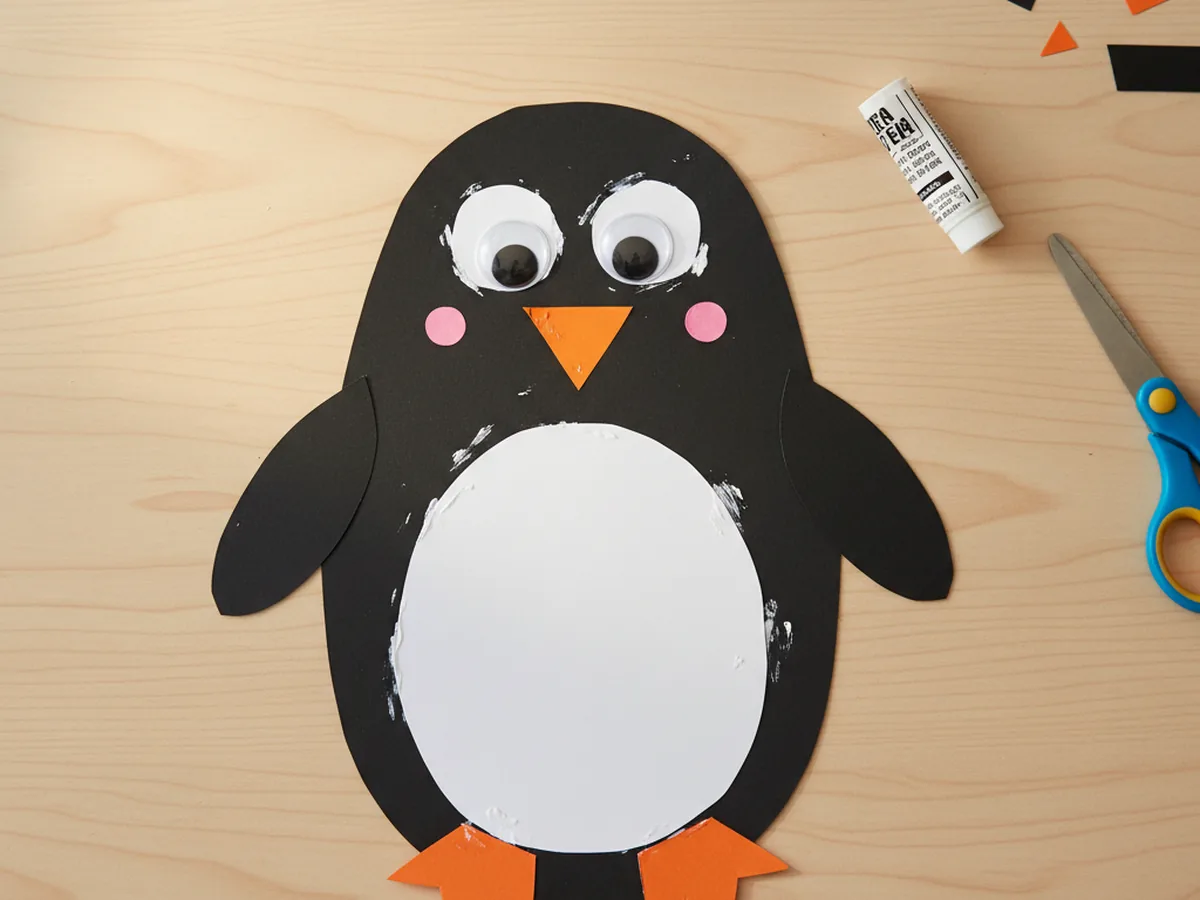
Step 6: Attach the Flippers and Feet
From the leftover black paper, cut two narrow oval flippers, one for each side of the body. They should be roughly half the height of the penguin's body and curve gently outward. Glue one to each side of the black oval body, near the top half. Then cut two small orange triangles or rounded shapes for the feet. Glue them at the very bottom of the body, side by side, so they peek out like little penguin feet. Your penguin paper craft now has a full silhouette.
Step 7: Finish with a Cozy Scarf and Snowflakes
This is the best step. Cut a thin red rectangle from construction paper, about as long as the penguin is wide, and glue it across the neck where the black body meets the bottom of the head area. You can fringe the ends gently with scissors so it looks like a tiny knit scarf. Then cut a few small white paper snowflakes or use a marker to dot small snowflakes around the blue background. Penguins are wonderfully chatty arctic and Antarctic seabirds, and your finished paper penguin craft looks like a happy little explorer ready for a snow day. ✨
Variations to Try
Penguin Family on a Spread: Make a big penguin and one or two smaller penguins on the same blue paper to create a sweet little family scene. Vary the size of the bodies and bellies, and let your child decide which one is the parent and which ones are the babies. This version turns the penguin paper craft into a whole storytelling moment.
3D Cardboard Tube Penguin: Swap the flat paper body for a toilet paper roll painted black on the upper half and white on the belly. Add the same paper beak, googly eyes, flippers, and feet. This version stands up on a shelf and makes a darling display piece, perfect for slightly older kids who want a more dimensional craft.
Holiday Penguin Version: Add a tiny red and white Santa hat made from two small paper triangles glued together at the top of the penguin's head, plus a few green paper holly leaves around the snowflakes. The same craft suddenly becomes a charming Christmas card front or December classroom decoration.
Final Thoughts
This penguin paper craft is one of those small, joyful afternoons that feels much bigger than the sum of its parts. A handful of paper shapes, a few minutes of cutting, and suddenly there is a chubby, smiling little penguin on the page with its own personality. Your child will glow with pride when it is done, and you will have one of those quiet, cozy memories where everyone was happily focused side by side.
Tape the finished penguin somewhere visible so your little crafter can admire their work all week. There is real magic in watching a child point at the wall and say, "I made him, and his name is Pip."
More Crafts You'll Love
If your child loved this penguin paper craft, these other animal-themed paper projects make wonderful next activities: