
Few crafts capture a little one quite like a handprint, and this turkey handprint craft turns your child's open hand into the cutest Thanksgiving keepsake on the fridge. The palm becomes a plump turkey body, the thumb turns into a wobbly little head, and those four fingers fan out into colorful fall feathers. With a sheet of cardstock, some washable paint, and a few minutes together, you and your child can make a turkey you will both want to save year after year. It is foolproof for beginners, gentle enough for toddlers, and so much fun to peel away and see. Let's make a sweet little gobbler together! 🦃
Why Kids Love This Craft
Kids light up over this craft because the turkey is made from their very own hand. That makes it feel personal and proud in a way no store-bought decoration ever could. Pressing a painted palm onto paper is also wonderfully satisfying, a little squishy and a little ticklish, and lifting the hand to find a turkey waiting underneath is the happiest kind of surprise. 😊
There is gentle learning tucked inside the fun too. Spreading the paint and pressing down builds hand strength and body awareness, while gluing on the tiny eye and beak gives little fingers great fine motor practice. Choosing which color goes on each feather lets your child make real decisions, which quietly grows their confidence.
Best of all, this turkey handprint craft is forgiving and low-stress. A smudge or a crooked feather only makes the turkey look more handmade and more loved, so there is zero pressure to be perfect. The supplies are simple, the washable paint wipes off easily, and the project works for every age, which makes it an easy yes on a busy fall afternoon.
What You'll Need
Here is everything you need for this easy handprint turkey craft, and most of it is probably already waiting in your craft drawer.
- White cardstock, a sturdy sheet that holds the paint without curling or soaking through.
- Washable kids paint, in brown plus fall colors like red, orange, and yellow.
- Foam brushes, perfect for spreading a thin, even layer of paint on little hands.
- Self-adhesive googly eyes, for giving your turkey a cute and friendly face.
- Construction paper, for cutting a small orange beak and a little red waddle.
- Washable glue sticks, for sticking the beak and waddle onto the head.
- Washable markers, for drawing the legs and writing a thankful message.
- Baby wipes or a damp cloth, for quick and easy hand cleanup afterward.
Step-by-Step Instructions
Ready to make a turkey your family will smile at all season long? Follow these simple steps and you will have a finished handprint in about half an hour, with a few helper tips along the way.
Step 1: Set Up Your Paper and Fall Colors
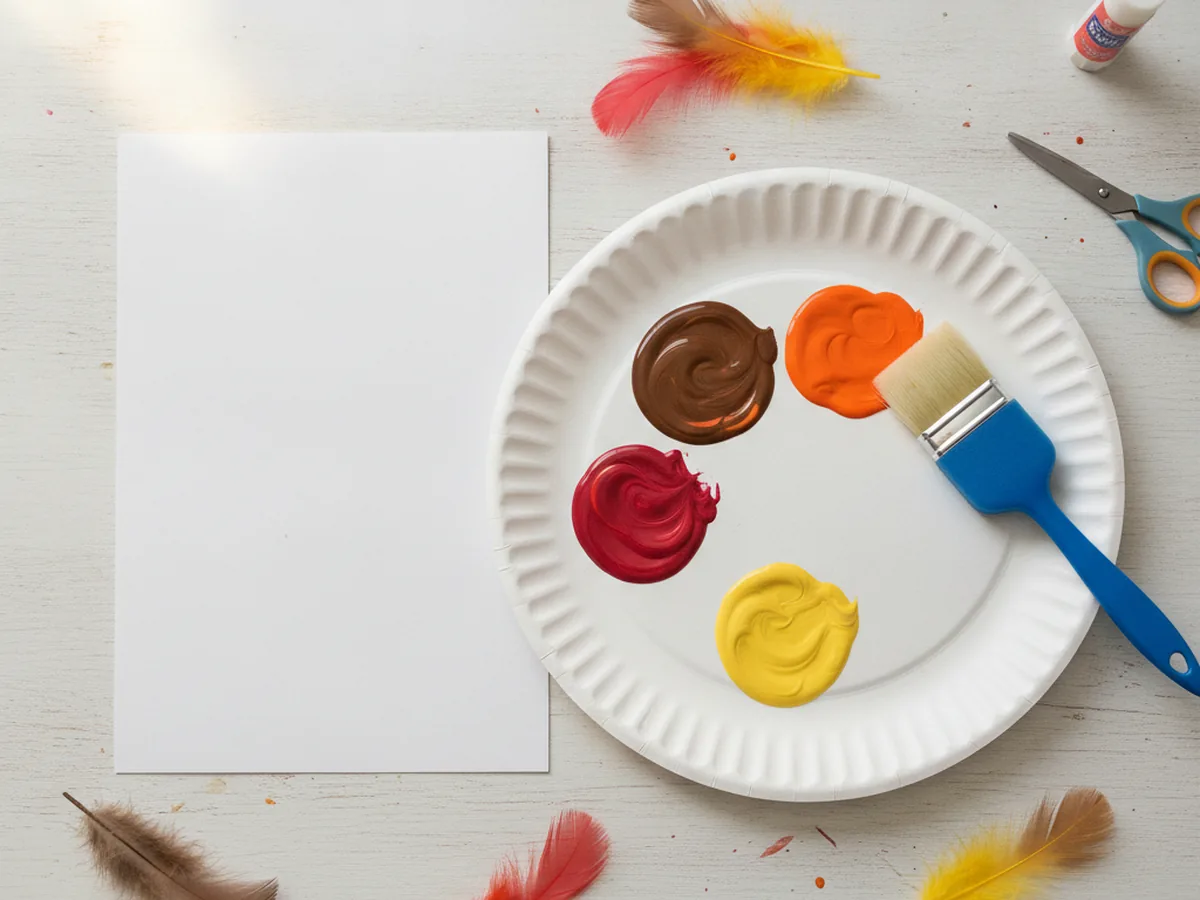
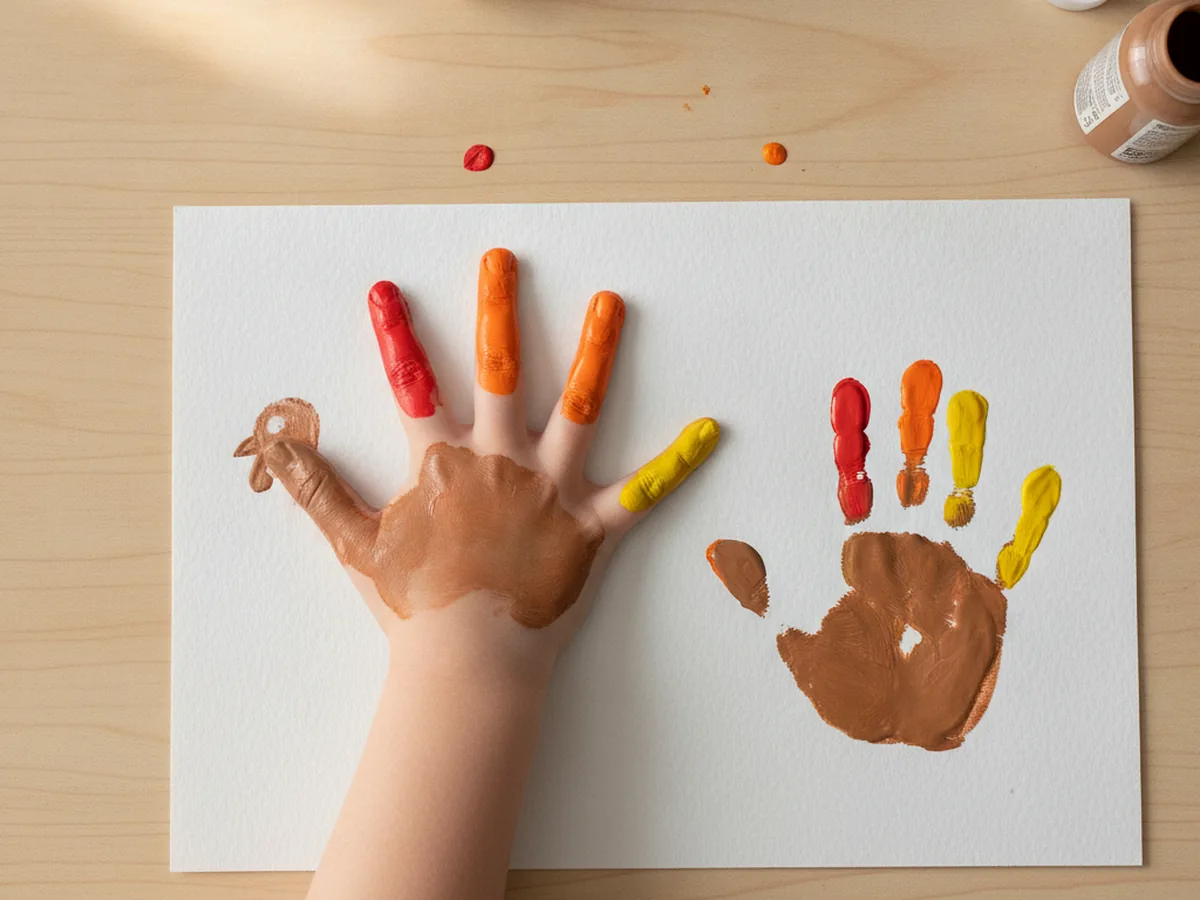
Start by laying a sheet of sturdy cardstock on your work surface and squeezing little puddles of brown, red, orange, and yellow washable paint onto a plate. Brown is for the turkey's body and head, and the warm fall colors are for the feathers. Setting everything out before painting keeps this turkey handprint craft calm and easy, so you are not searching for a color with paint already on your child's hand.
Step 2: Paint the Palm and Fingers
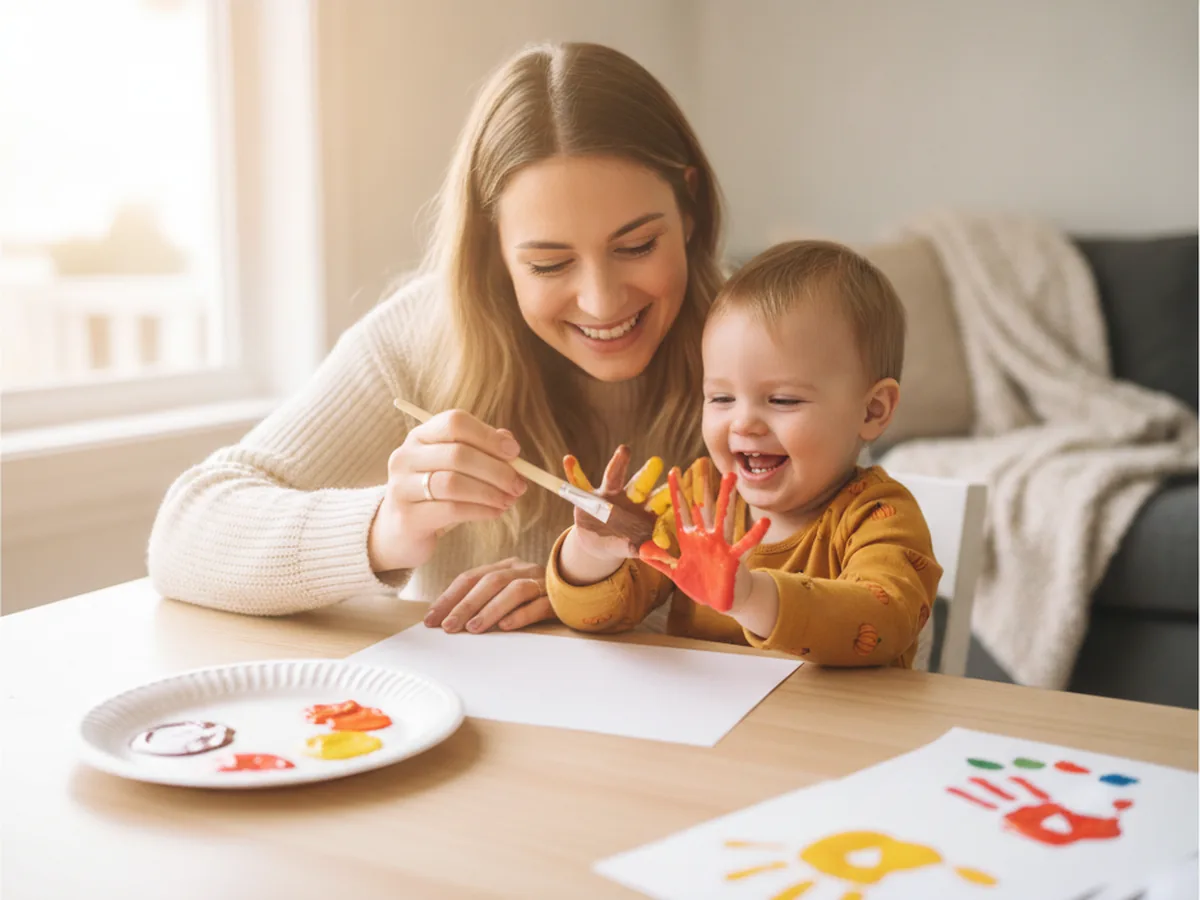
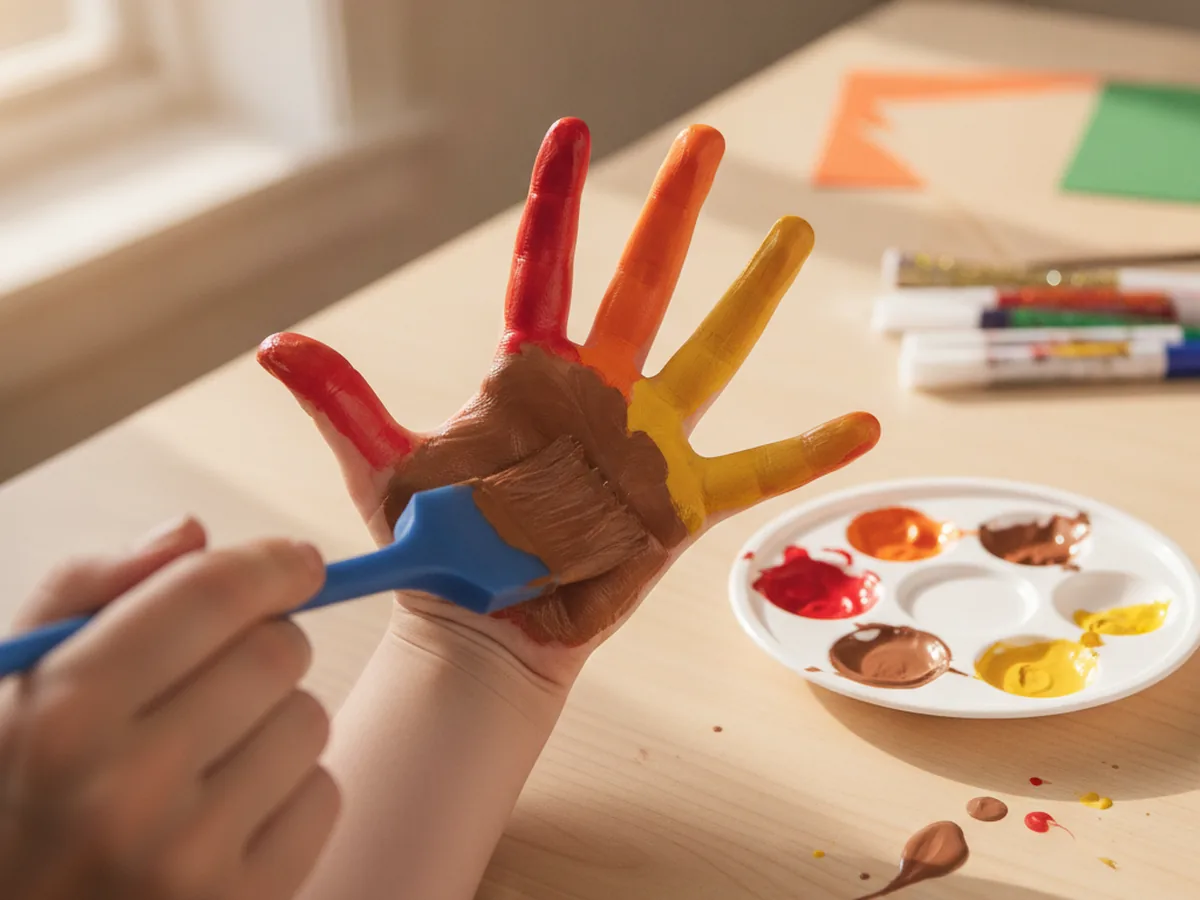
Now for the fun part. Use a foam brush to paint your child's palm and thumb brown, since those become the turkey's body and head. Then paint each of the four fingers a different fall color, like red, orange, and yellow, to make the bright tail feathers. A thin, even layer prints much more clearly than a thick, gloopy one, so brush off any extra before you press.
Step 3: Press the Handprint
Help your child spread their fingers wide, with the thumb pointing out to one side, then press their painted hand firmly onto the cardstock. Gently push down on each finger and the heel of the palm so the whole print transfers, then lift the hand straight up without sliding it. Peeling the hand away to reveal a little turkey shape is the magic moment of the entire turkey handprint craft, so go slow and enjoy it together. ✨
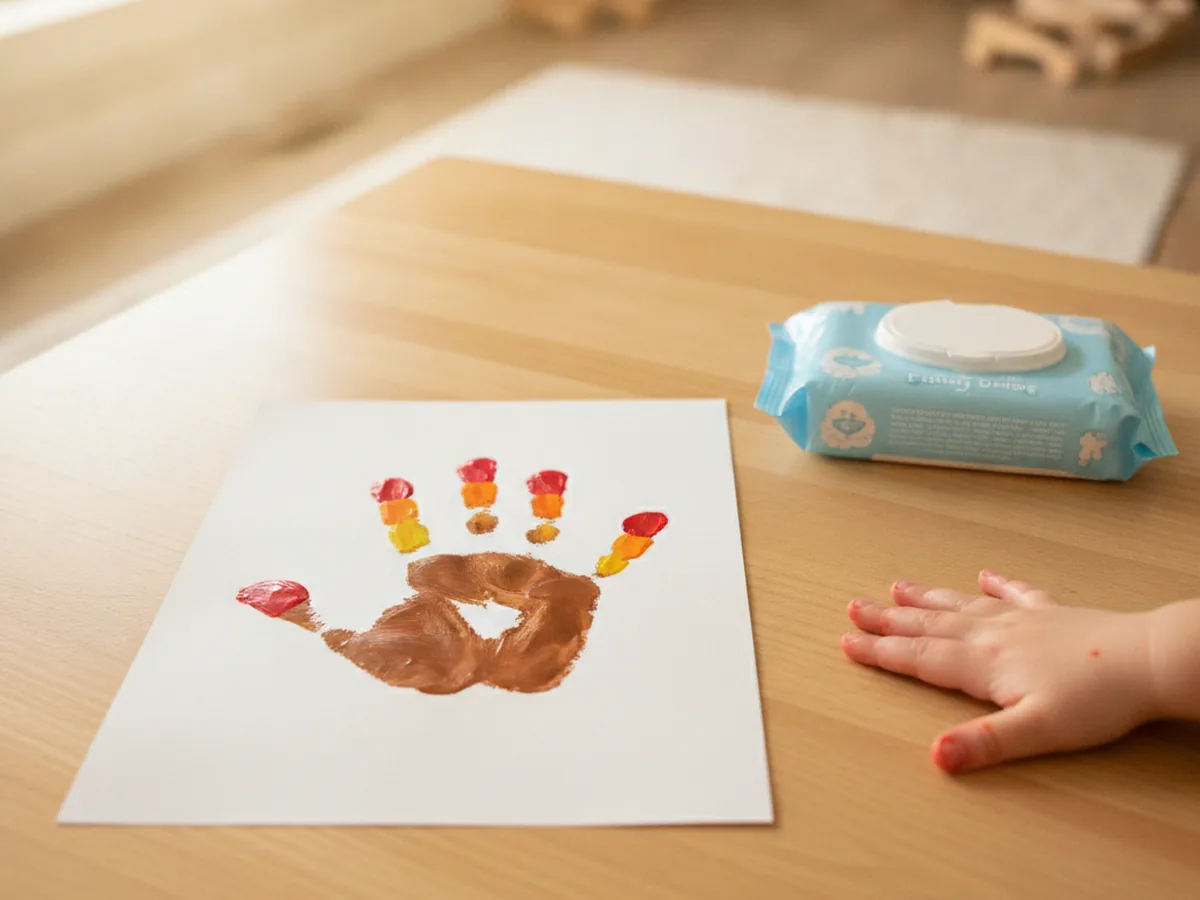
Step 4: Let It Dry and Clean Up
Set the print somewhere flat and safe to dry for a few minutes while you wipe your child's hand clean with a baby wipe or damp cloth. Washable paint comes off skin easily, so cleanup is quick and stress-free. Letting the print dry fully before you decorate keeps the colors from smearing, and it gives your little one a happy moment to admire the turkey they just made.
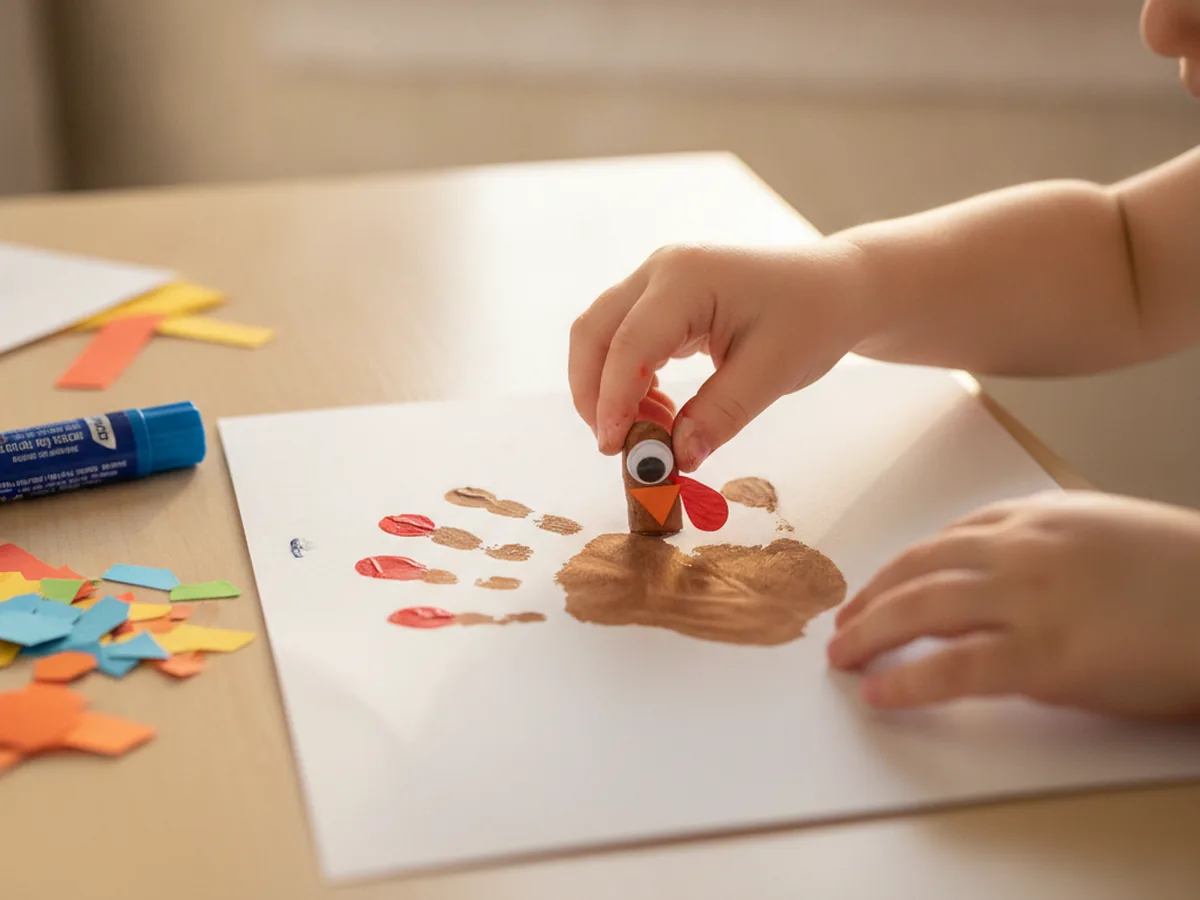
Step 5: Add the Turkey's Face
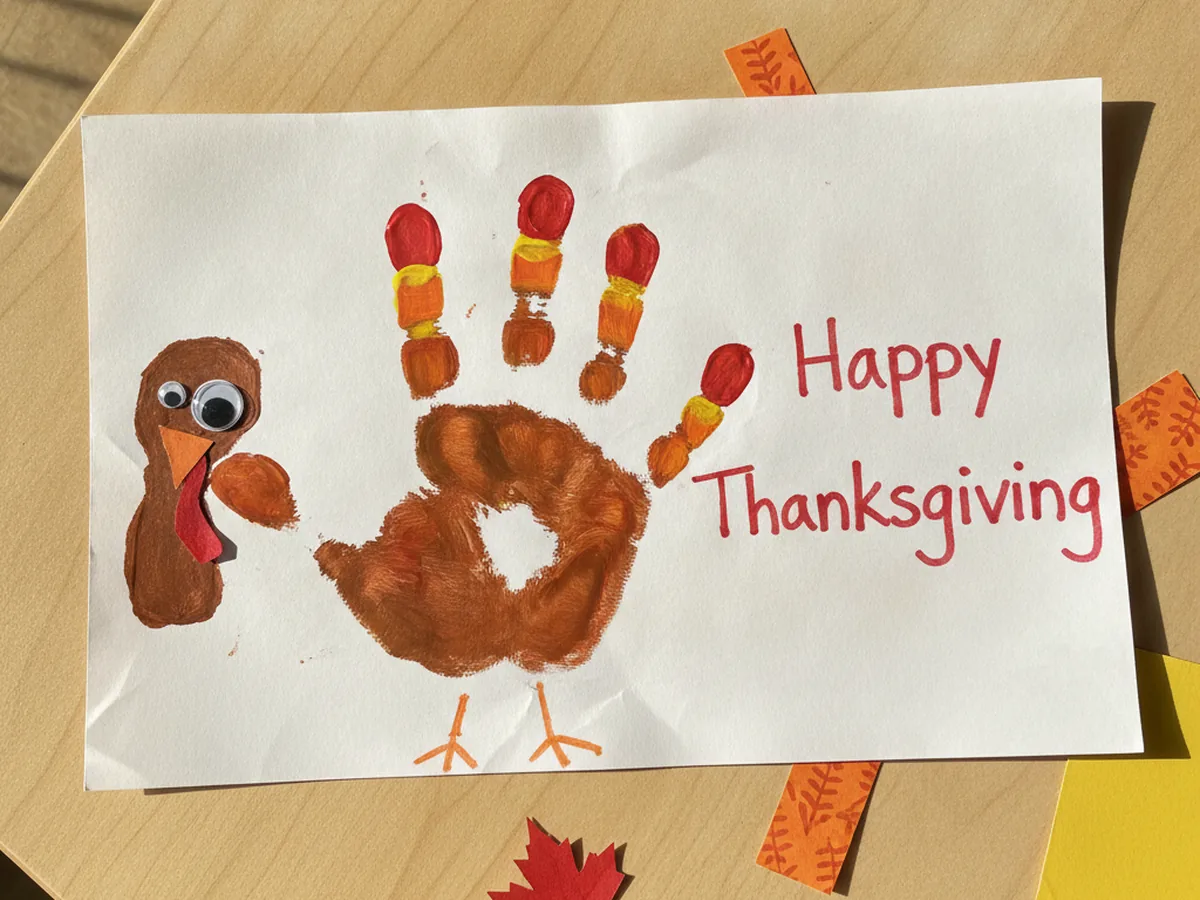
Once the print is dry, it is time to bring your turkey to life. The brown thumb is the head, so glue a googly eye near the tip, add a small orange paper triangle for the beak, and stick a little red paper teardrop just below it for the waddle. These tiny details are what turn a brown thumbprint into an unmistakable, friendly little turkey.
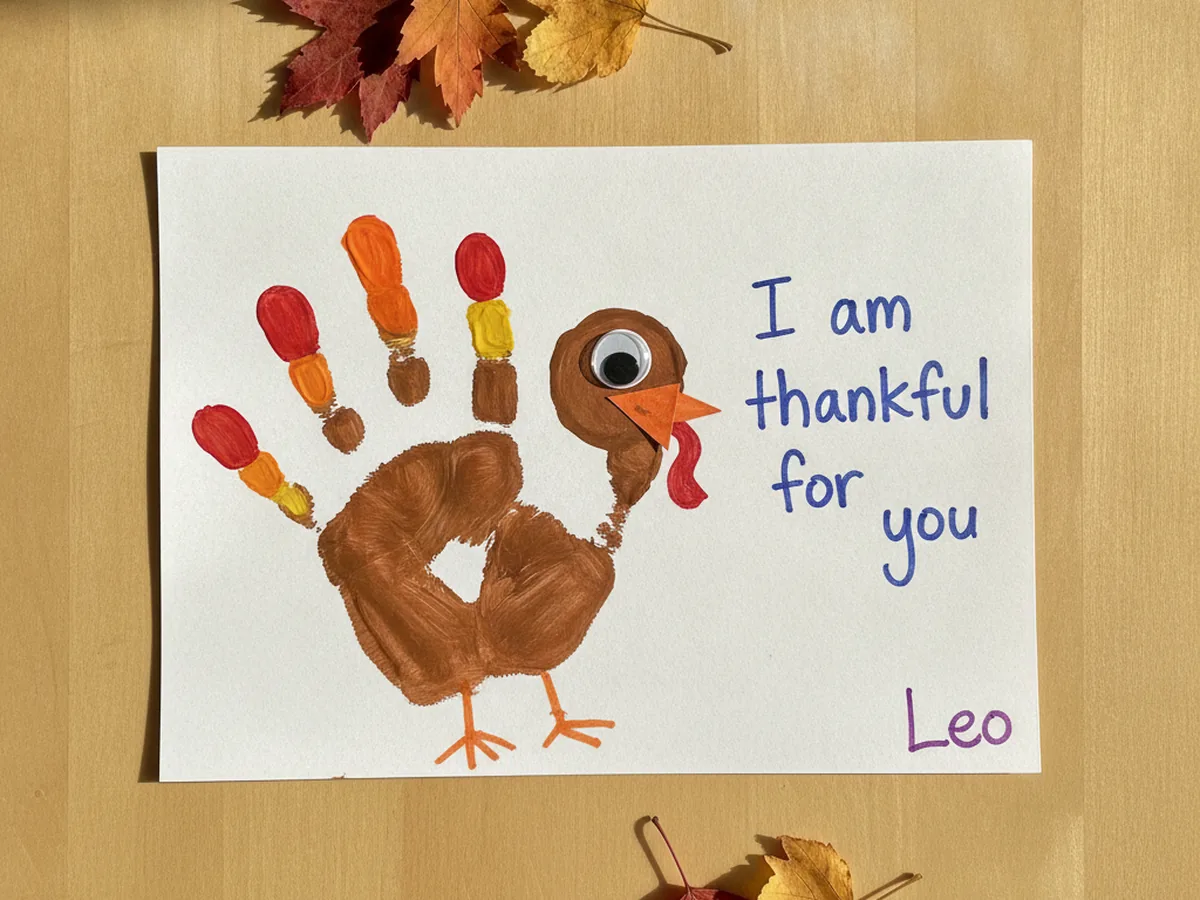
Step 6: Add Legs and a Thankful Message
Now finish your turkey with a few last touches. Use a marker to draw two little orange legs poking out from the bottom of the palm, then write a sweet message such as "Happy Thanksgiving" or "I am thankful for you" beside the body. Have your child sign their name and the year, and your turkey handprint craft is ready to display. Step back and admire the cheerful little gobbler you made together.
Variations to Try
Footprint Turkey: Trade the handprint for a footprint to capture your littlest one before they grow. The heel becomes the body and the toes become tiny feathers, making an unbelievably sweet keepsake for babies who cannot open their hands for a print just yet.
Torn Paper Feathers: Skip the painted fingers and let your child tear or cut feather shapes from fall-colored construction paper instead, then glue them behind a brown palm print. This adds fun texture and gives older kids a little more to do.
Thankful Turkey Banner: Make one turkey for each family member and write what everyone is grateful for on its feathers. String the prints together for a warm Thanksgiving banner that turns this simple turkey handprint craft into a family centerpiece.
Final Thoughts
This turkey handprint craft proves that the sweetest Thanksgiving decorations are the ones made by little hands. It takes just a few supplies and half an hour, yet it captures something you cannot buy anywhere, the exact size of your child's hand on this one special fall. The smudges and the slightly crooked feathers are not mistakes at all, they are the parts that will make you smile every time you see it. 🍂
So spread out some paper, squeeze out the paint, and savor this cozy little moment with your child. The turkey will look adorable on the fridge, and you will treasure the memory of making it together. Happy crafting, friend! 🧡
More Crafts You'll Love
If your little one loved making this sweet Thanksgiving turkey, these cozy fall crafts are a perfect next project: