
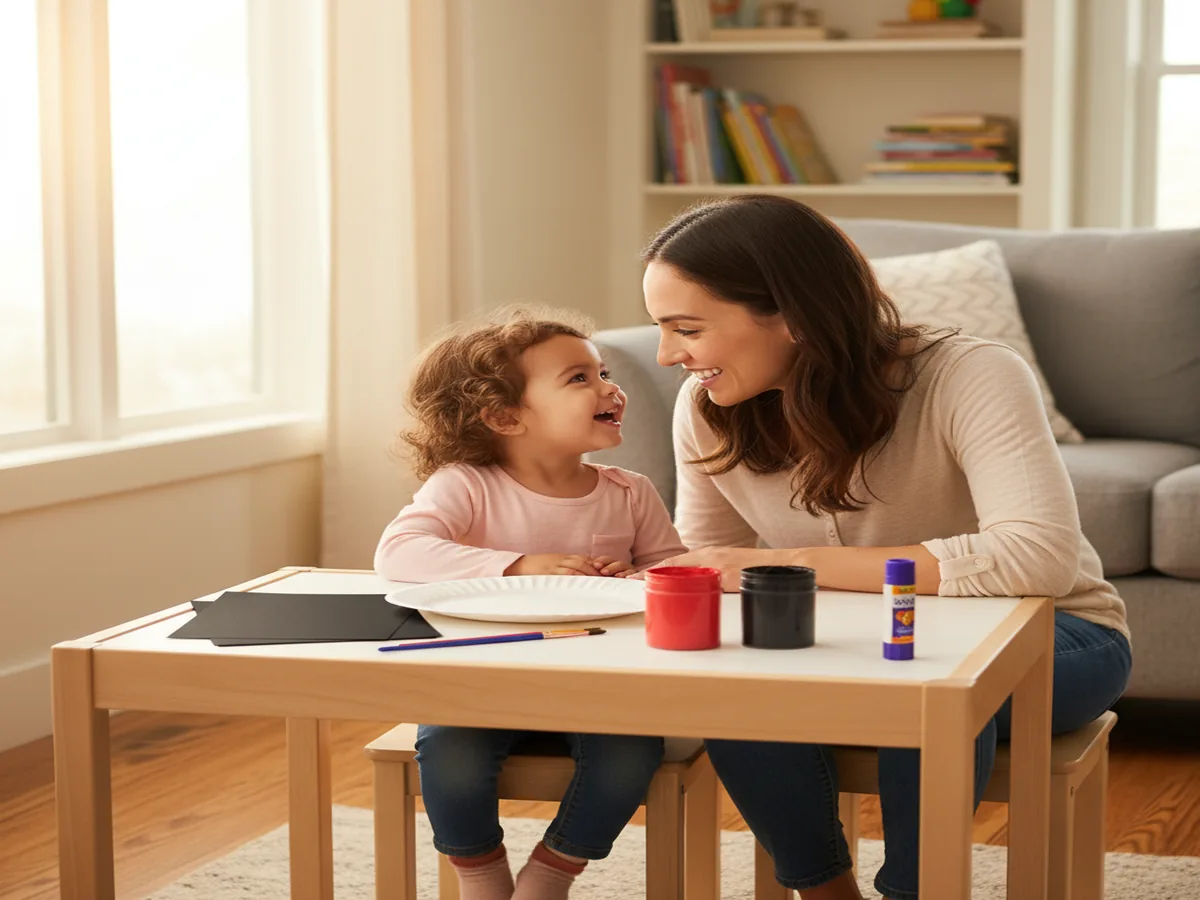
If you're looking for a fun, colorful spring craft that even the littlest hands can tackle, you're in the right place! This easy paper plate ladybug craft for toddlers is one of our absolute favorites. It comes together in about 15 minutes, uses supplies you probably already have at home, and the end result is so stinking cute that you'll want to hang it on the fridge immediately. Grab your little one, throw on some old clothes, and let's get crafting!
Why Kids Love This Craft
There's something about ladybugs that makes kids absolutely light up. Maybe it's the bright red color, the cute little spots, or the fact that ladybugs are one of the few bugs that toddlers actually want to hold! This paper plate ladybug art project for kids taps into that natural excitement and turns it into a hands-on creative experience. Your child gets to paint, tear, stick, and assemble — all while building fine motor skills they'll use every single day.
Beyond the fun factor, this craft is genuinely doable for tiny humans. There's no tricky cutting, no frustrating folding, and no "Mom, I can't do it!" meltdowns. The paper plate provides a sturdy, forgiving canvas that's easy for little fingers to grip and decorate. Whether your kiddo is 2 or 5, they'll feel proud of what they created.
What You'll Need
Grab these simple supplies before you get started. Most of them you probably already have on hand!
- White paper plate, standard size or small — both work great.
- Red washable tempera paint, toddler-safe formula.
- Black construction paper, for the head and spots.
- Googly eyes, medium or large size are easiest for little hands.
- Sponge brush or foam paintbrush, great for easy coverage.
- Glue stick or white school glue.
- Black dot stickers or black washable marker for the spots.
- Scissors, for grown-up use only.
Step-by-Step Instructions
Step 1: Paint the Paper Plate Red
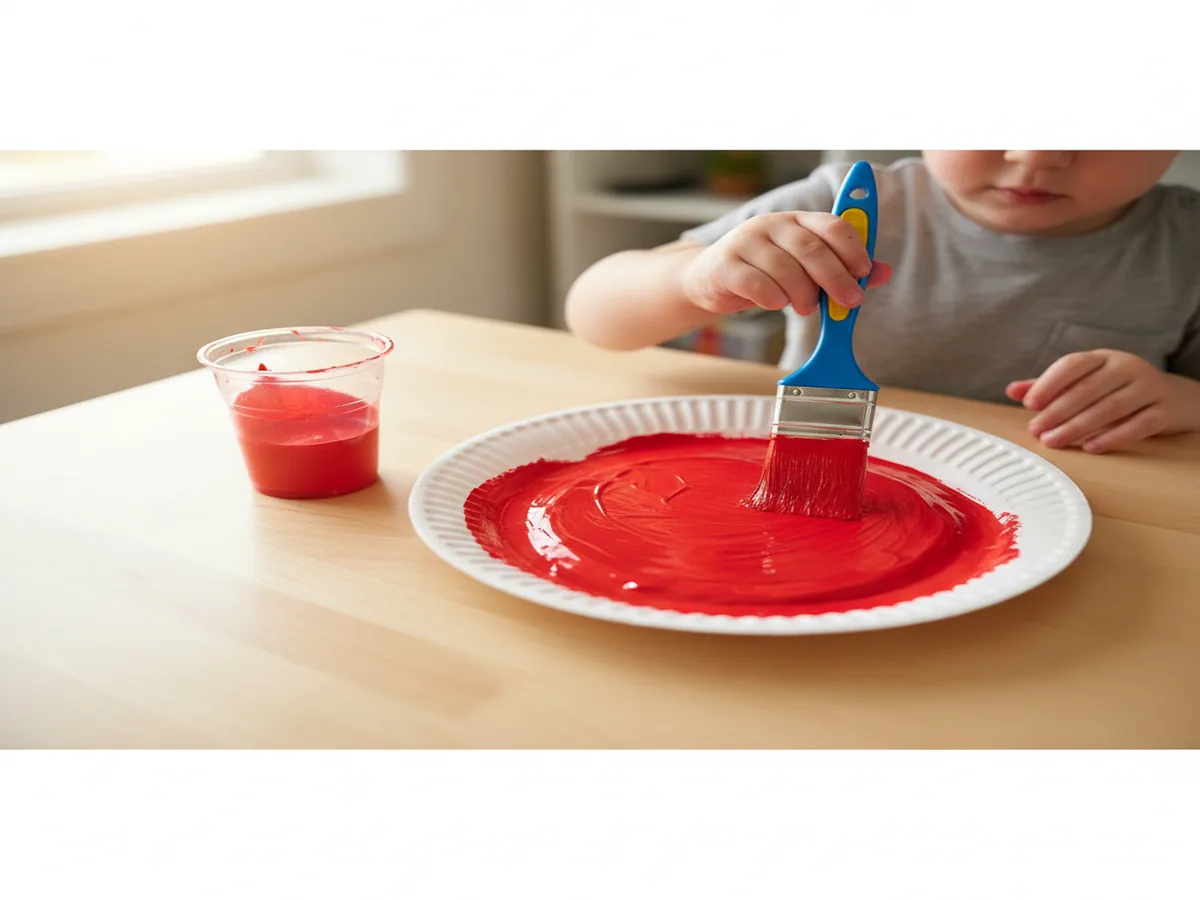
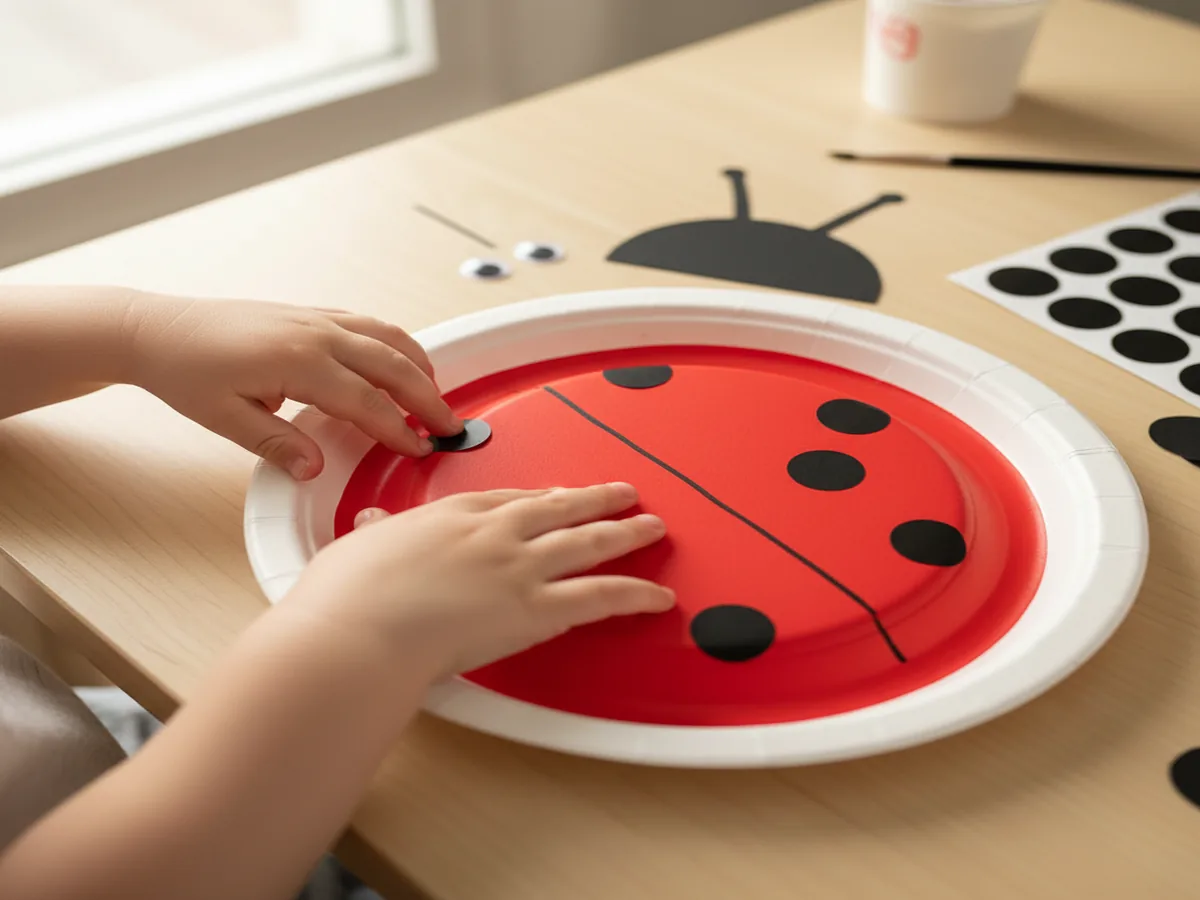
Start by squeezing a generous dollop of red washable paint onto the back (bottom) side of the paper plate. Let your toddler go to town spreading it around with a brush, sponge, or their fingers! Finger painting is half the fun for little ones and it's amazing for sensory development. Don't worry about perfect coverage — a little white peeking through just adds character. Once the plate is covered, set it aside to dry completely.
Step 2: Create the Ladybug's Head
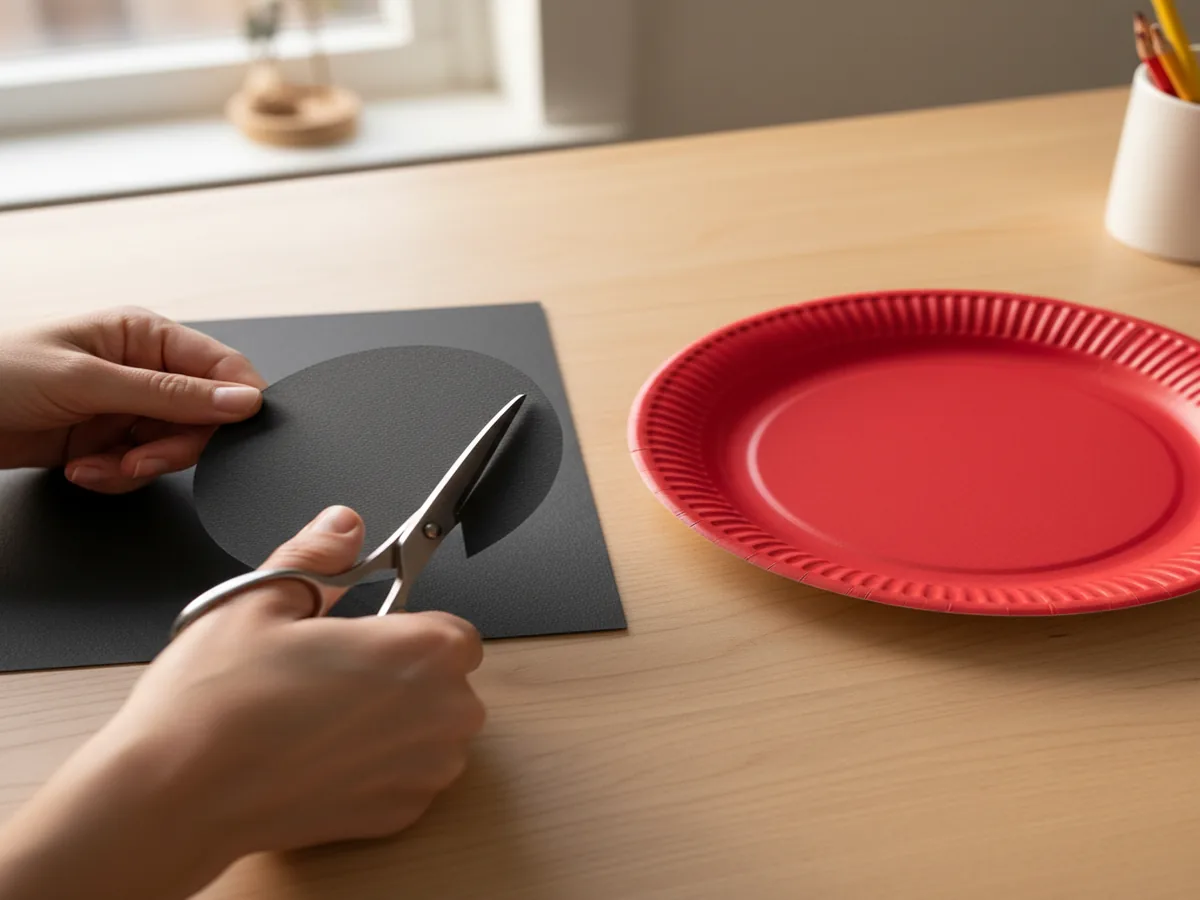
While the paint dries, make the head! Cut a half-circle from black construction paper, roughly the size of one-third of the paper plate. It doesn't need to be perfect — ladybugs in nature aren't symmetrical either. If your child is a preschooler working on scissor skills, draw the shape and let them try cutting with safety scissors. For younger toddlers, this is a grown-up step.
Step 3: Add the Spots
Now for the most exciting part: the spots! Black dot stickers are perfect for toddlers because peeling and sticking is great fine motor practice with zero drying time. If you don't have stickers, cut small circles from black construction paper and let your child glue them on. Older kids can use a black marker or dip their fingertip in black paint for polka dots. Let your child place as many or as few spots as they want — no rules here!
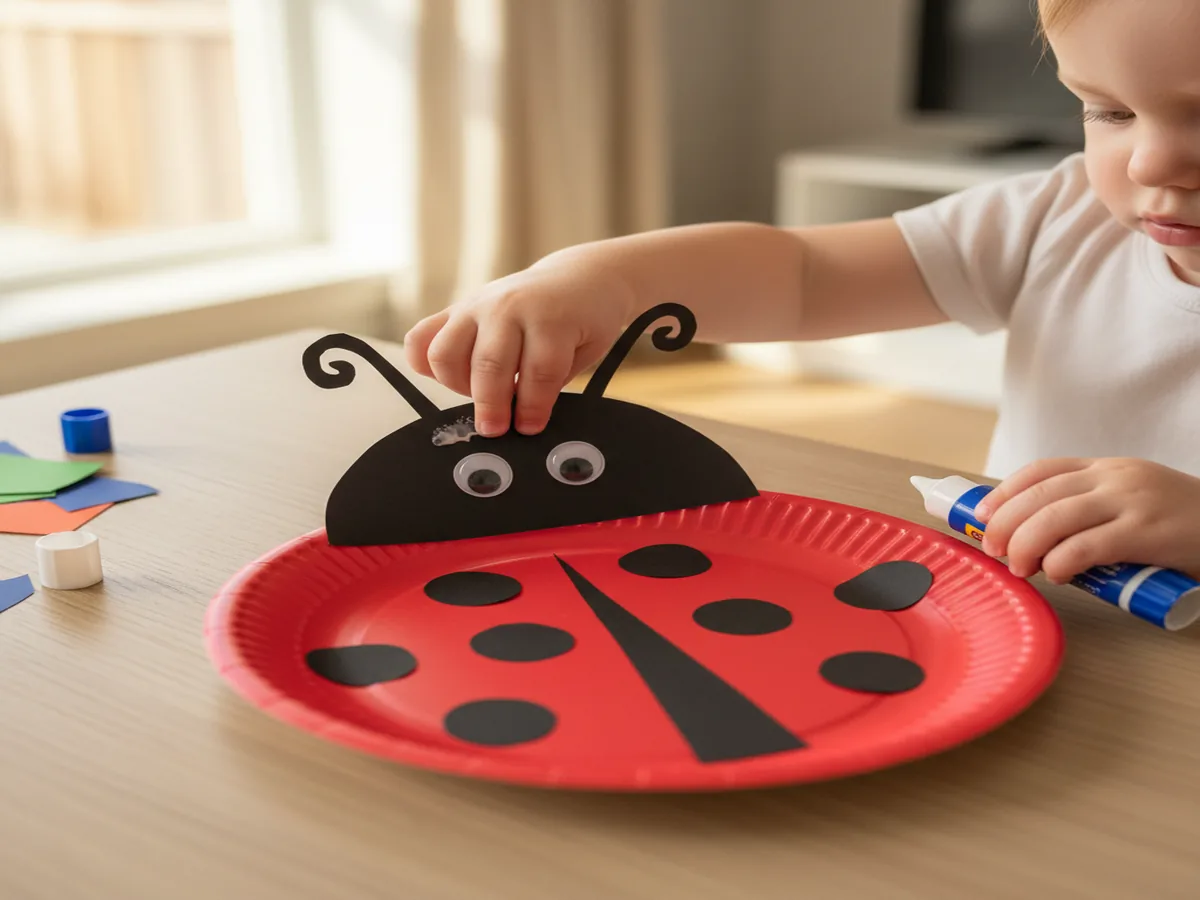
Step 4: Attach the Head and Eyes
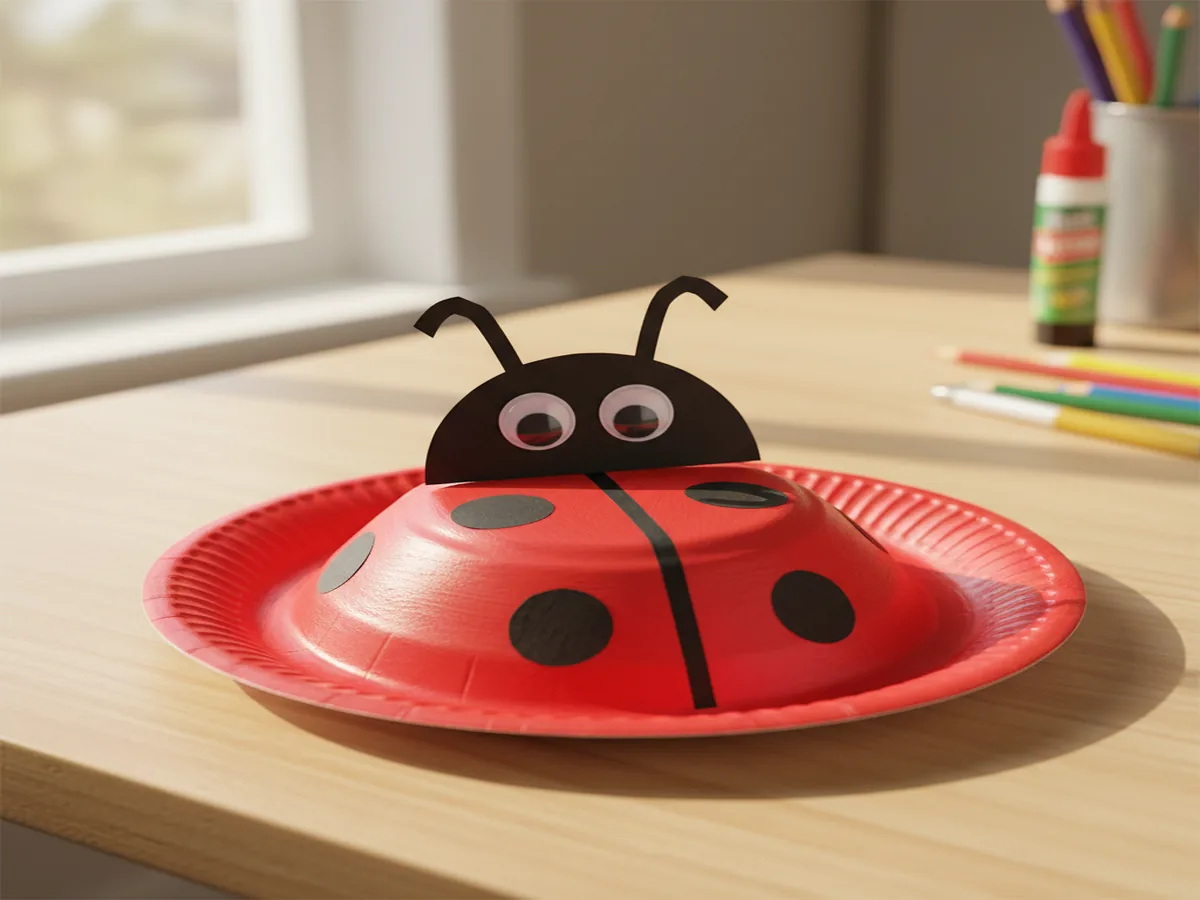
Once the red paint is dry and the spots are on, it's time to bring this little bug to life! Help your child glue the black half-circle head onto the top edge of the paper plate. A glue stick works well, though white school glue gives a stronger hold if you plan to hang the craft. Next, the best part: googly eyes! Let your toddler peel the backing or add a dab of glue and press those wiggly eyes right onto the black head.
Step 5: Add the Finishing Touches
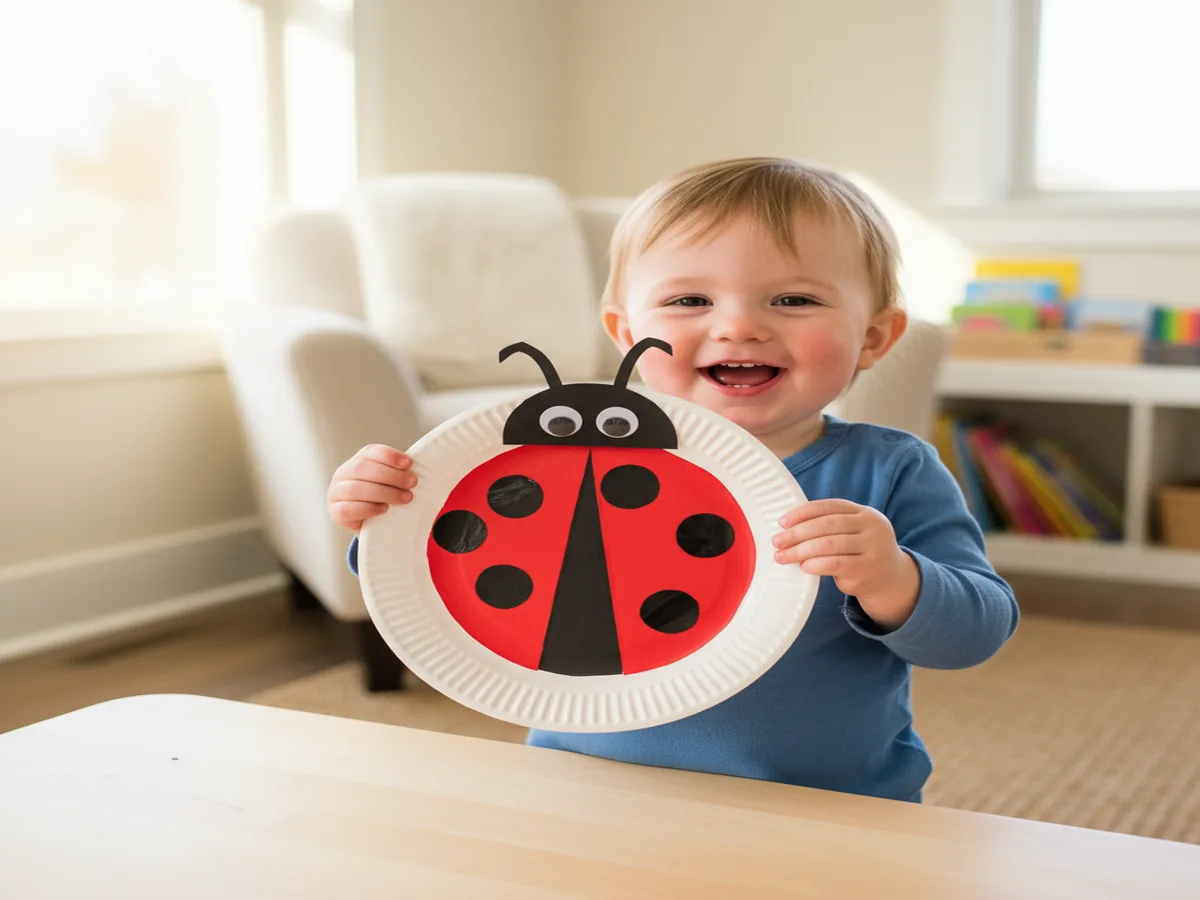
To complete your ladybug, draw a vertical line down the center of the red plate with a black marker — this represents the line where the wings meet! You can also cut two small strips of black construction paper, curl them slightly for antennae, and glue them to the back of the head. If your child wants to add a smiley mouth, little legs, or even glitter, let their creativity run wild. And just like that, you've got one adorable ladybug ready to display!
Variations to Try
Tissue Paper Ladybug: Skip the paint entirely and let your child glue small squares of red tissue paper onto the plate instead. This mosaic-style approach is fantastic for fine motor development, creates a beautiful textured effect, and best of all, there's zero paint cleanup. It's an especially great option if you're crafting at a playdate or party with multiple kids.
Ladybug Family: Make a whole ladybug family using different sized plates! Use a large dinner plate for the mama ladybug, a standard plate for the kid ladybug, and small dessert plates for the baby ladybugs. Your toddler will love lining them up from biggest to smallest, and it sneaks in a little math practice too. Display them together on a wall or bulletin board for the most adorable spring decoration.
Magnetic Ladybug: Glue a magnet strip to the back of the finished ladybug and turn it into a fridge magnet! Use a smaller paper plate (or cut a standard plate down) so it's not too heavy. This makes a wonderful handmade gift for grandparents. Trust me, it'll stay on their fridge for years. This toddler ladybug craft with paper plates becomes an instant keepsake when you write your child's name and date on the back.
More Crafts You'll Love
If your little one had a blast with this easy paper plate ladybug craft for toddlers, you'll definitely want to try these too:
- Easy Paper Plate Butterfly Craft for Preschoolers: another adorable paper plate project perfect for spring!
- Easy Paper Plate Rainbow Fish Craft for Toddlers: a colorful, cheerful craft your little one will love.
Final Thoughts
This easy paper plate ladybug craft for toddlers is proof that you don't need fancy supplies or hours of free time to create something special with your child. In just 15 minutes, you get quality bonding time, a boost in your little one's fine motor skills, and an adorable ladybug that'll make everyone smile. Whether you're doing this on a rainy afternoon, as part of a spring unit, or just because your kiddo said "I wanna make something!", this craft always delivers. If you try it, I'd love to see your little one's creation! Snap a photo and share it on Pinterest, and don't forget to pin this post so you can find it again next time you need a quick, easy win. Happy crafting, mama! 🐞❤️